PROJECT DETAILS
Roles
UX/UI Design
Physical Computing
Prototyping / Testing
Tools
Arduino
Illustrator
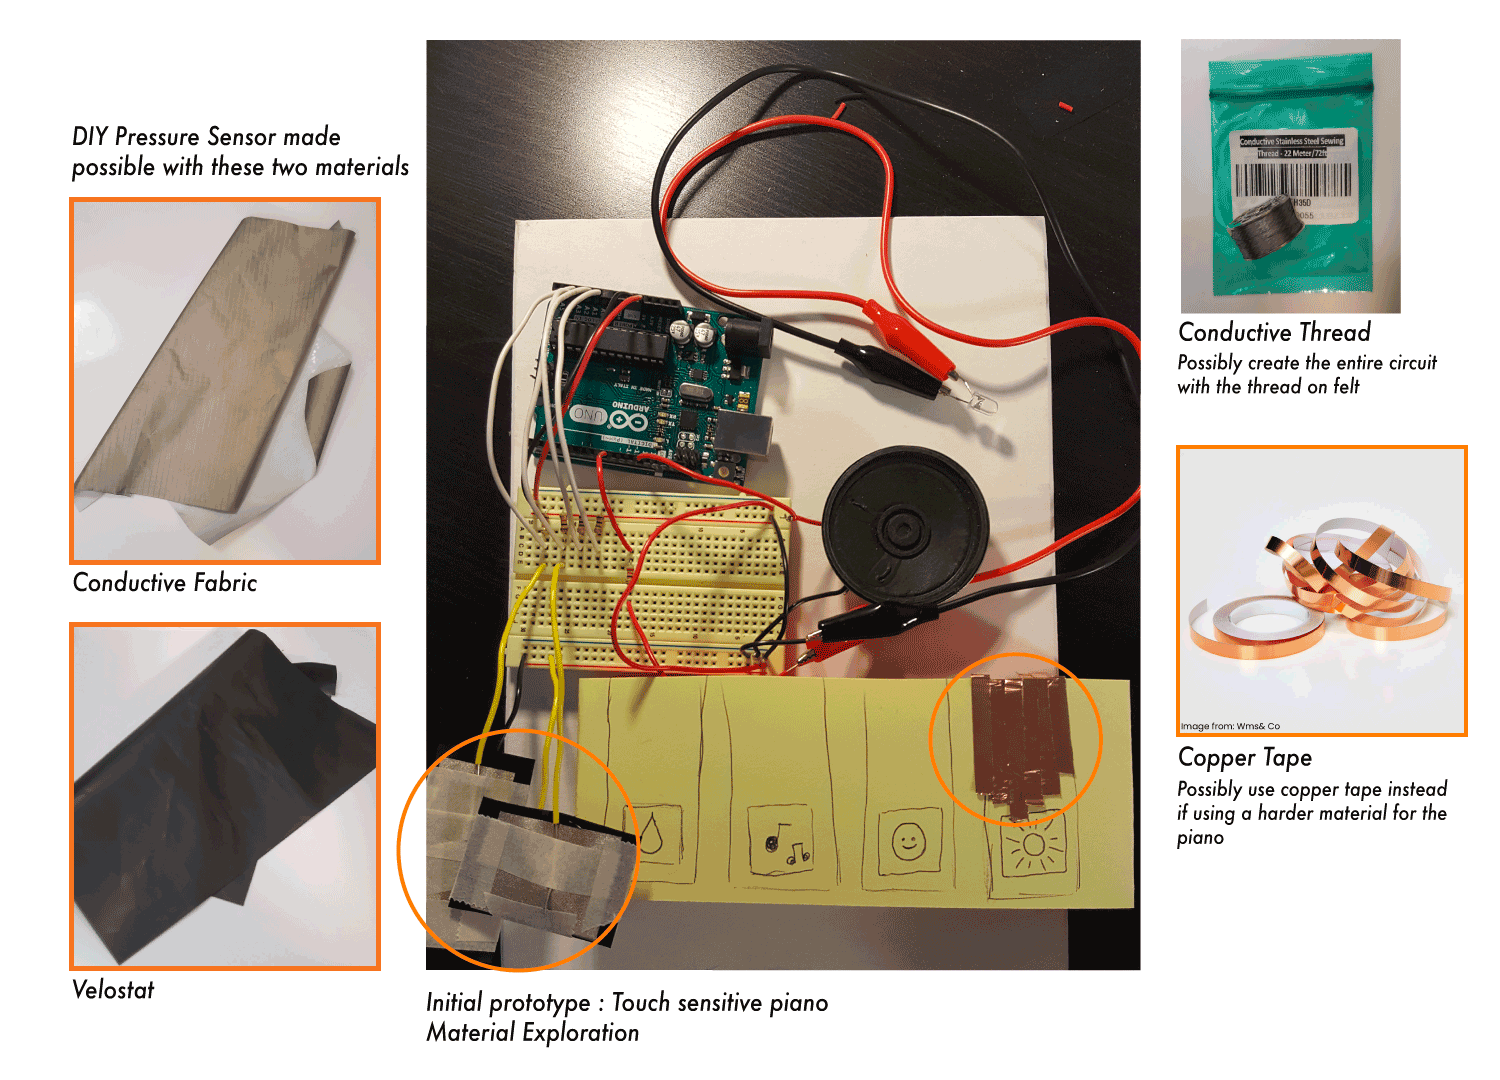
Conductive materials & sensors
Collaborators
None
This is a physical computing project that is dedicated to gain a better understanding of conductive materials and sensors. Flora is an engaging product for toddlers to help enhance their creative play while also acting as an artistic artifact that enhances the spatial environment of the room.
THE PROBLEM
Growing up in the 21st century, even toddlers are surrounded by the ever advancing technologies. It is the norm to see children glued to technological devices since it has become a popular and effortless parenting technique to use iPads and smart phones to distract toddlers with games and videos. In a way, these smart devices have replaced the toys that most children should be playing with in their early stages. Toddlers are spending more time glued to the screen of the digital world while not enough time interacting with the real world experiences and expanding their creative play through hands-on approach.
HOW MIGHT WE...
How might we deliver a product that celebrates conductive materials in a user friendly and engaging experience.
GOALS
- To showcase the use of DIY sensors in a creatively engaging way.
- To explore and be comfortable with physical computing and the use of different materials.
- To design a product that enhances play but also enhances the space within it.
THE SOLUTION
Creating an artistic and engaging product designed for toddlers that helps to enhances their creative minds and playfulness, while also alternating as an artistic artifact that helps enhance the spatial environment of the room.
Creative Fabrication: A playful and upgraded approach to a kid's toy piano that is designed to enlighten their senses with burst of colours and exploration of different materials.
THE USERS
Young children during their playtime as play is such a significant part of the child's development as it contributes greatly to the cognitive, physical, social and emotional learning. Play allows children to make sense of the world around them while helping to unleash their creativity.
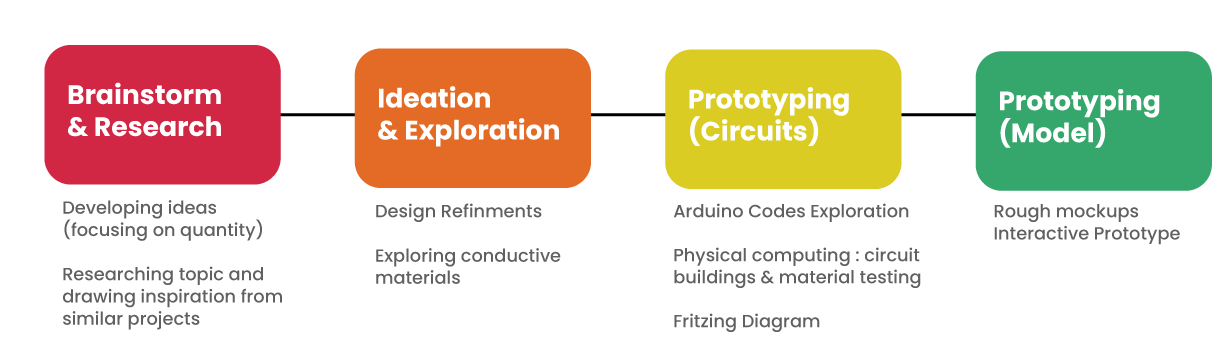
THE PROCESS
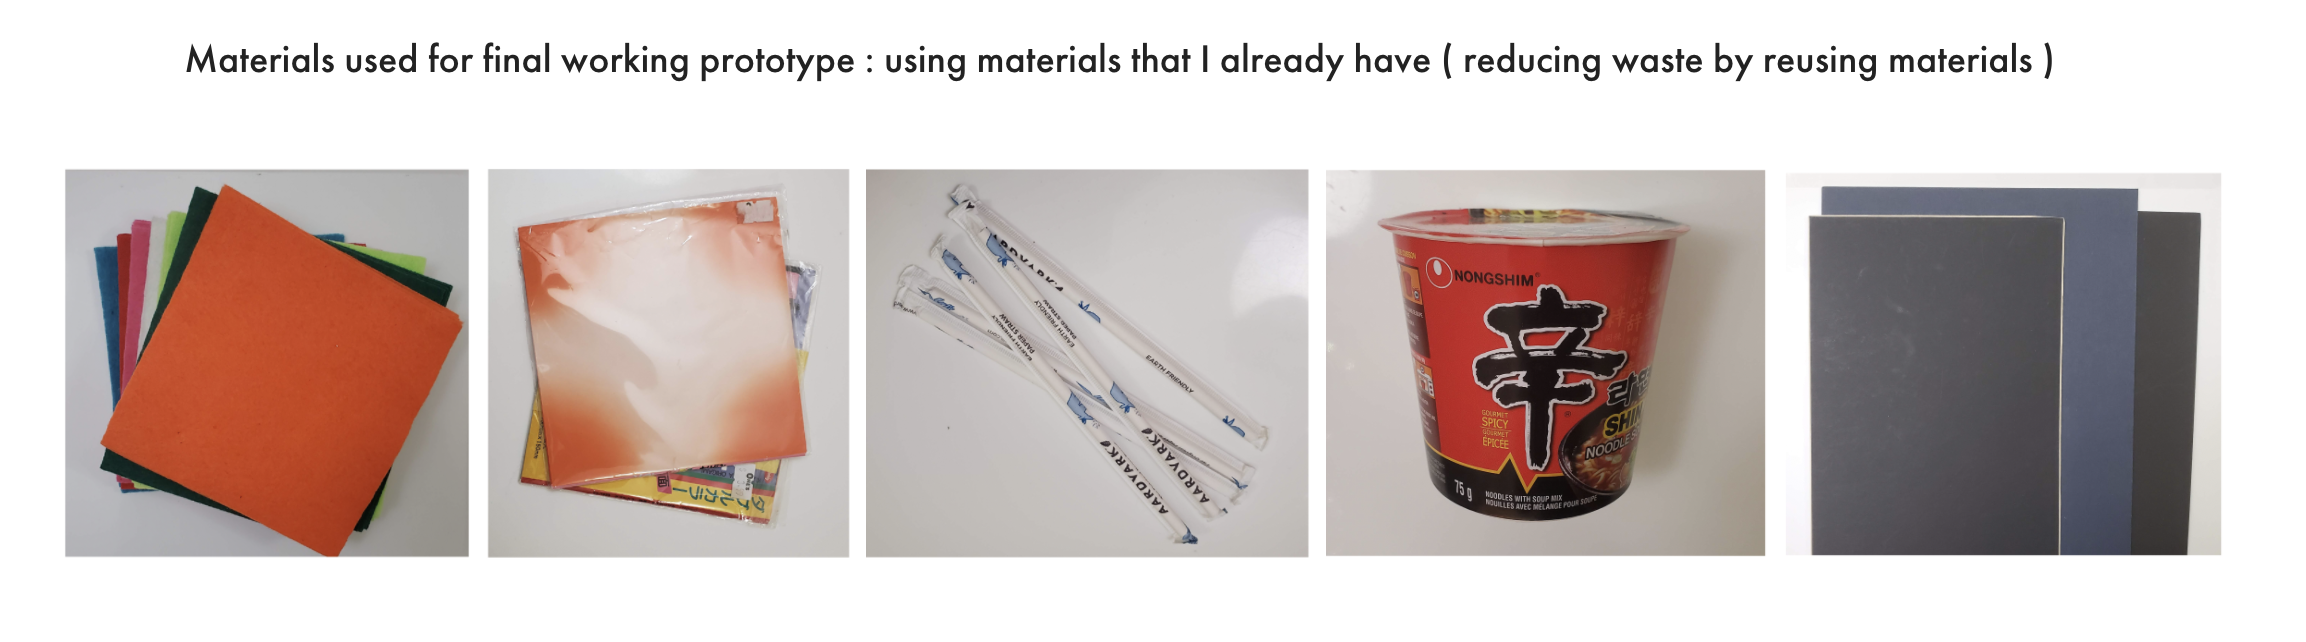
A process filled with material exploration, trial & error, endless design iterations, physical prototyping and circuitry building.
INSPIRATION
The solution drew inspiration from a sample book project that was found in kobakant.at website during research, specifically the image shown below which looks like a piano key. This gave the project a direction to go into and an area to focus on.
RESEARCH
Research was conducted to better understand the current problems that lies within each topic from the help of scholarly articles/journals, and related government websites. Through the research, key insights of each topic was derived to helped to drive the product and design
INITIAL BRAINSTORM - Rough Sketches of look and function of the product
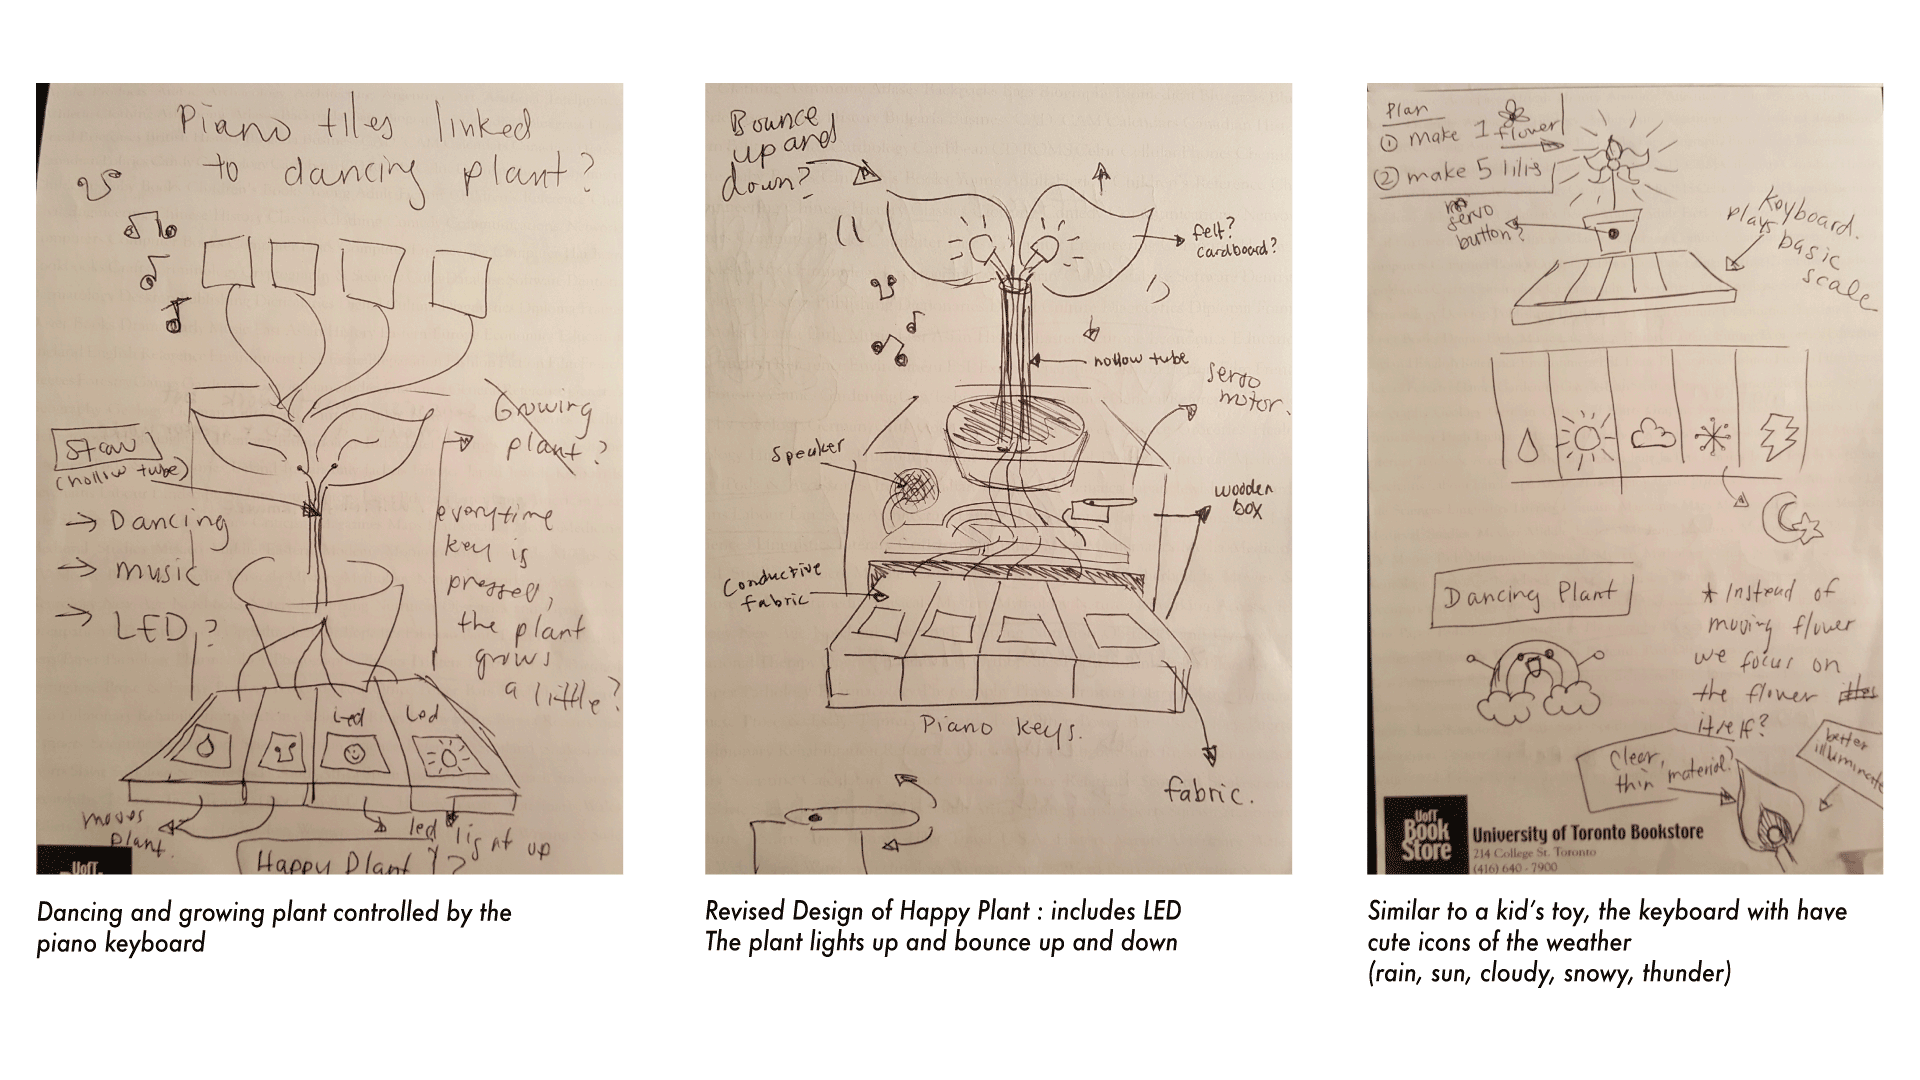
REFINING THE PROCESS - It is important to have as many questions answered before moving onto the design.
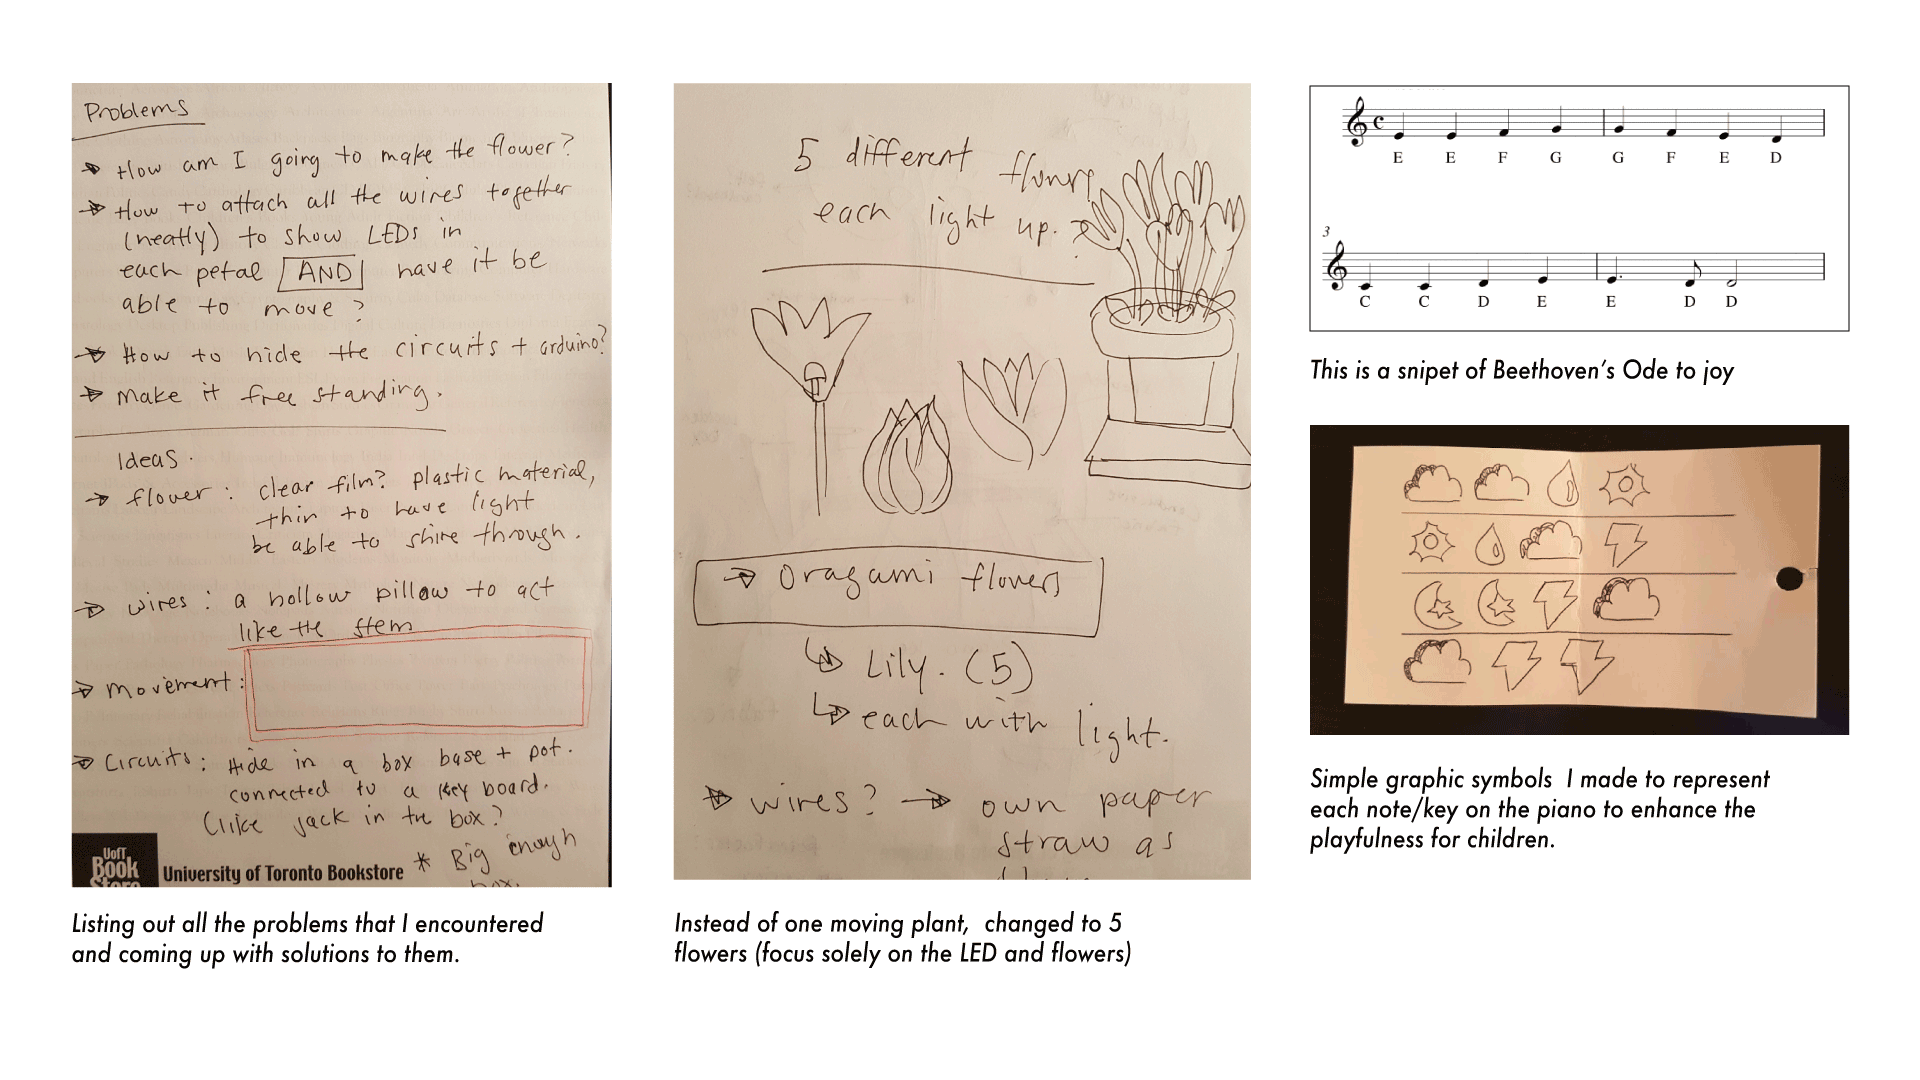
- What material should be used to create the flowers?I have to also keep in mind that it should be able to illuminate an LED but also hold its shape. The flower needs to be sturdy yet light in weight to ensure it will be able to move freely
- How am I going to attach the LEDs to the flowers and be able to move while hiding away all the wiring
- How might I make sure the artifact is free standing and with its circuits hidden from the user?
- What material should be used for the overall physical mockup that will help to promote playfulness?
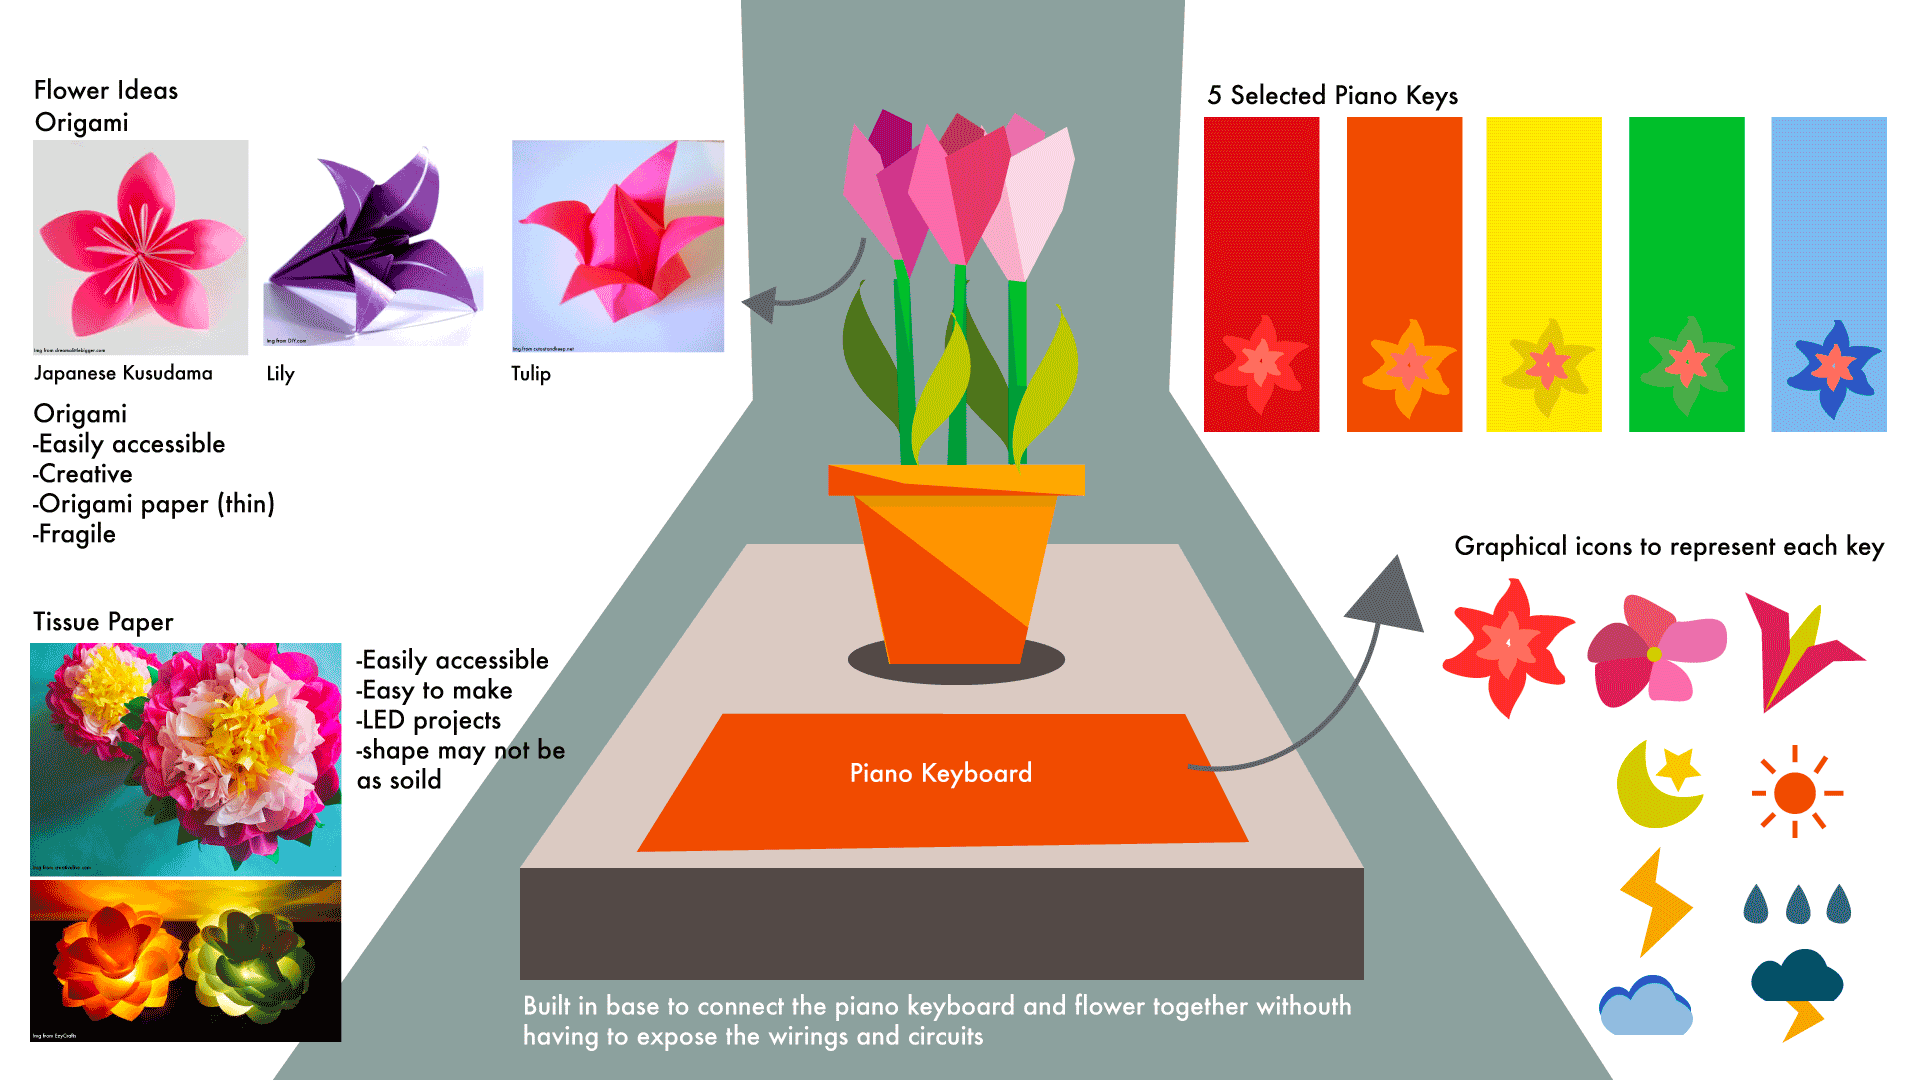
DESIGN ITERATIONS
Digital mockups and rough vector illustrations made on Illustrator to help visualize and expand on different ideas on how to construct the physical mockup of the solution.
Generating a variety of different flower pot designs that will compliment the final product
BRAINSTORMING
FINALIZING DIGITAL
MOCKUP DESIGN
Exploring different methods and design for each component (still in brainstorm stage - flexible to any changes that may occur)
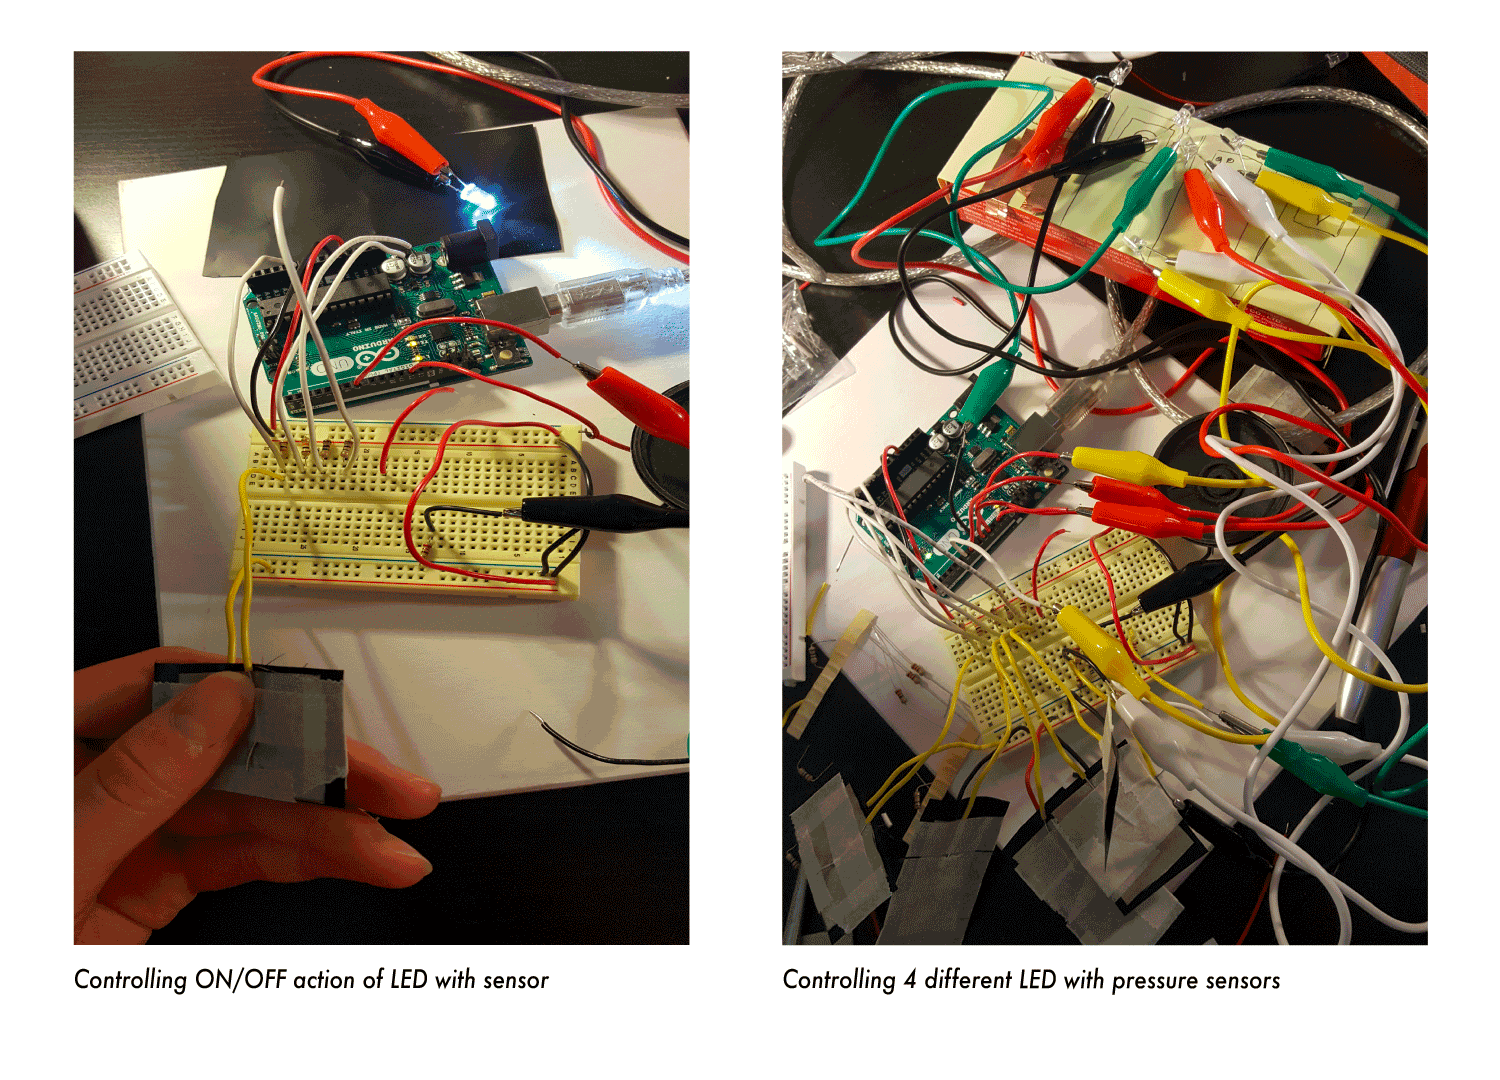
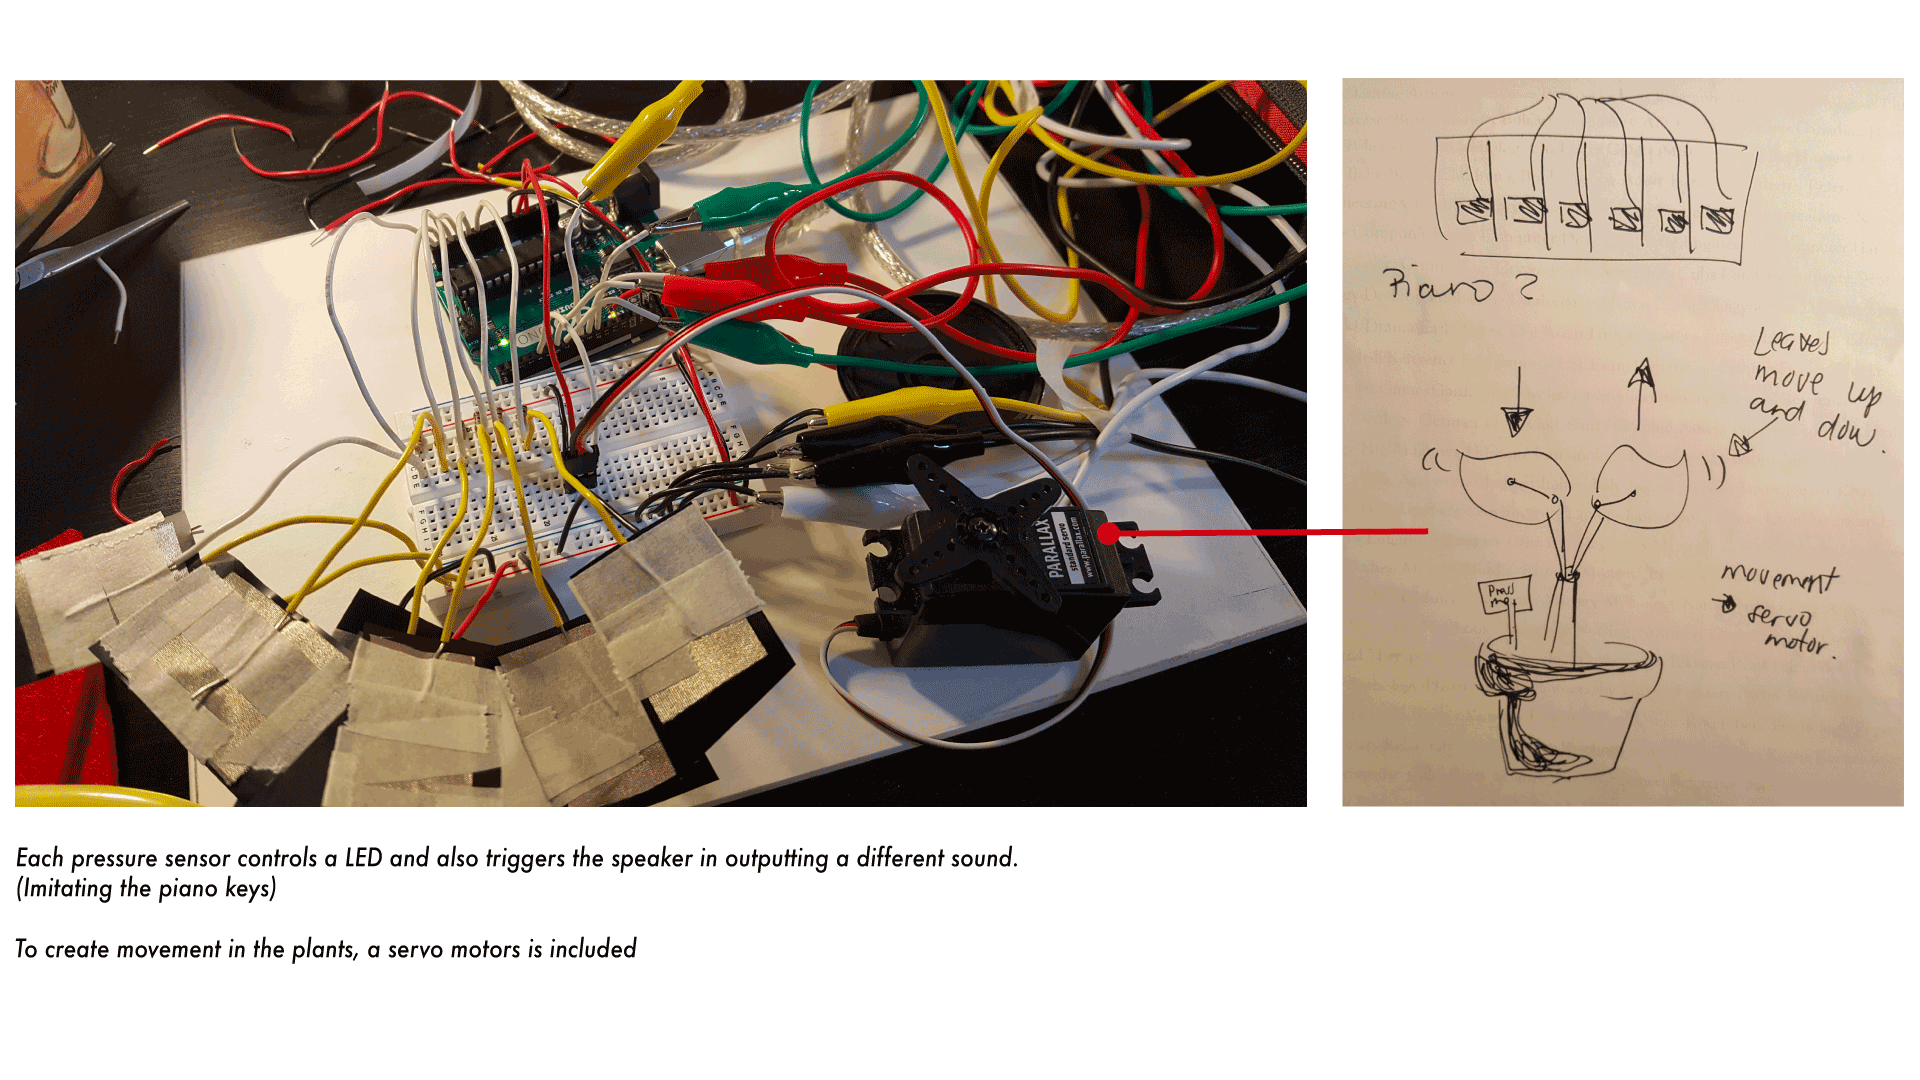
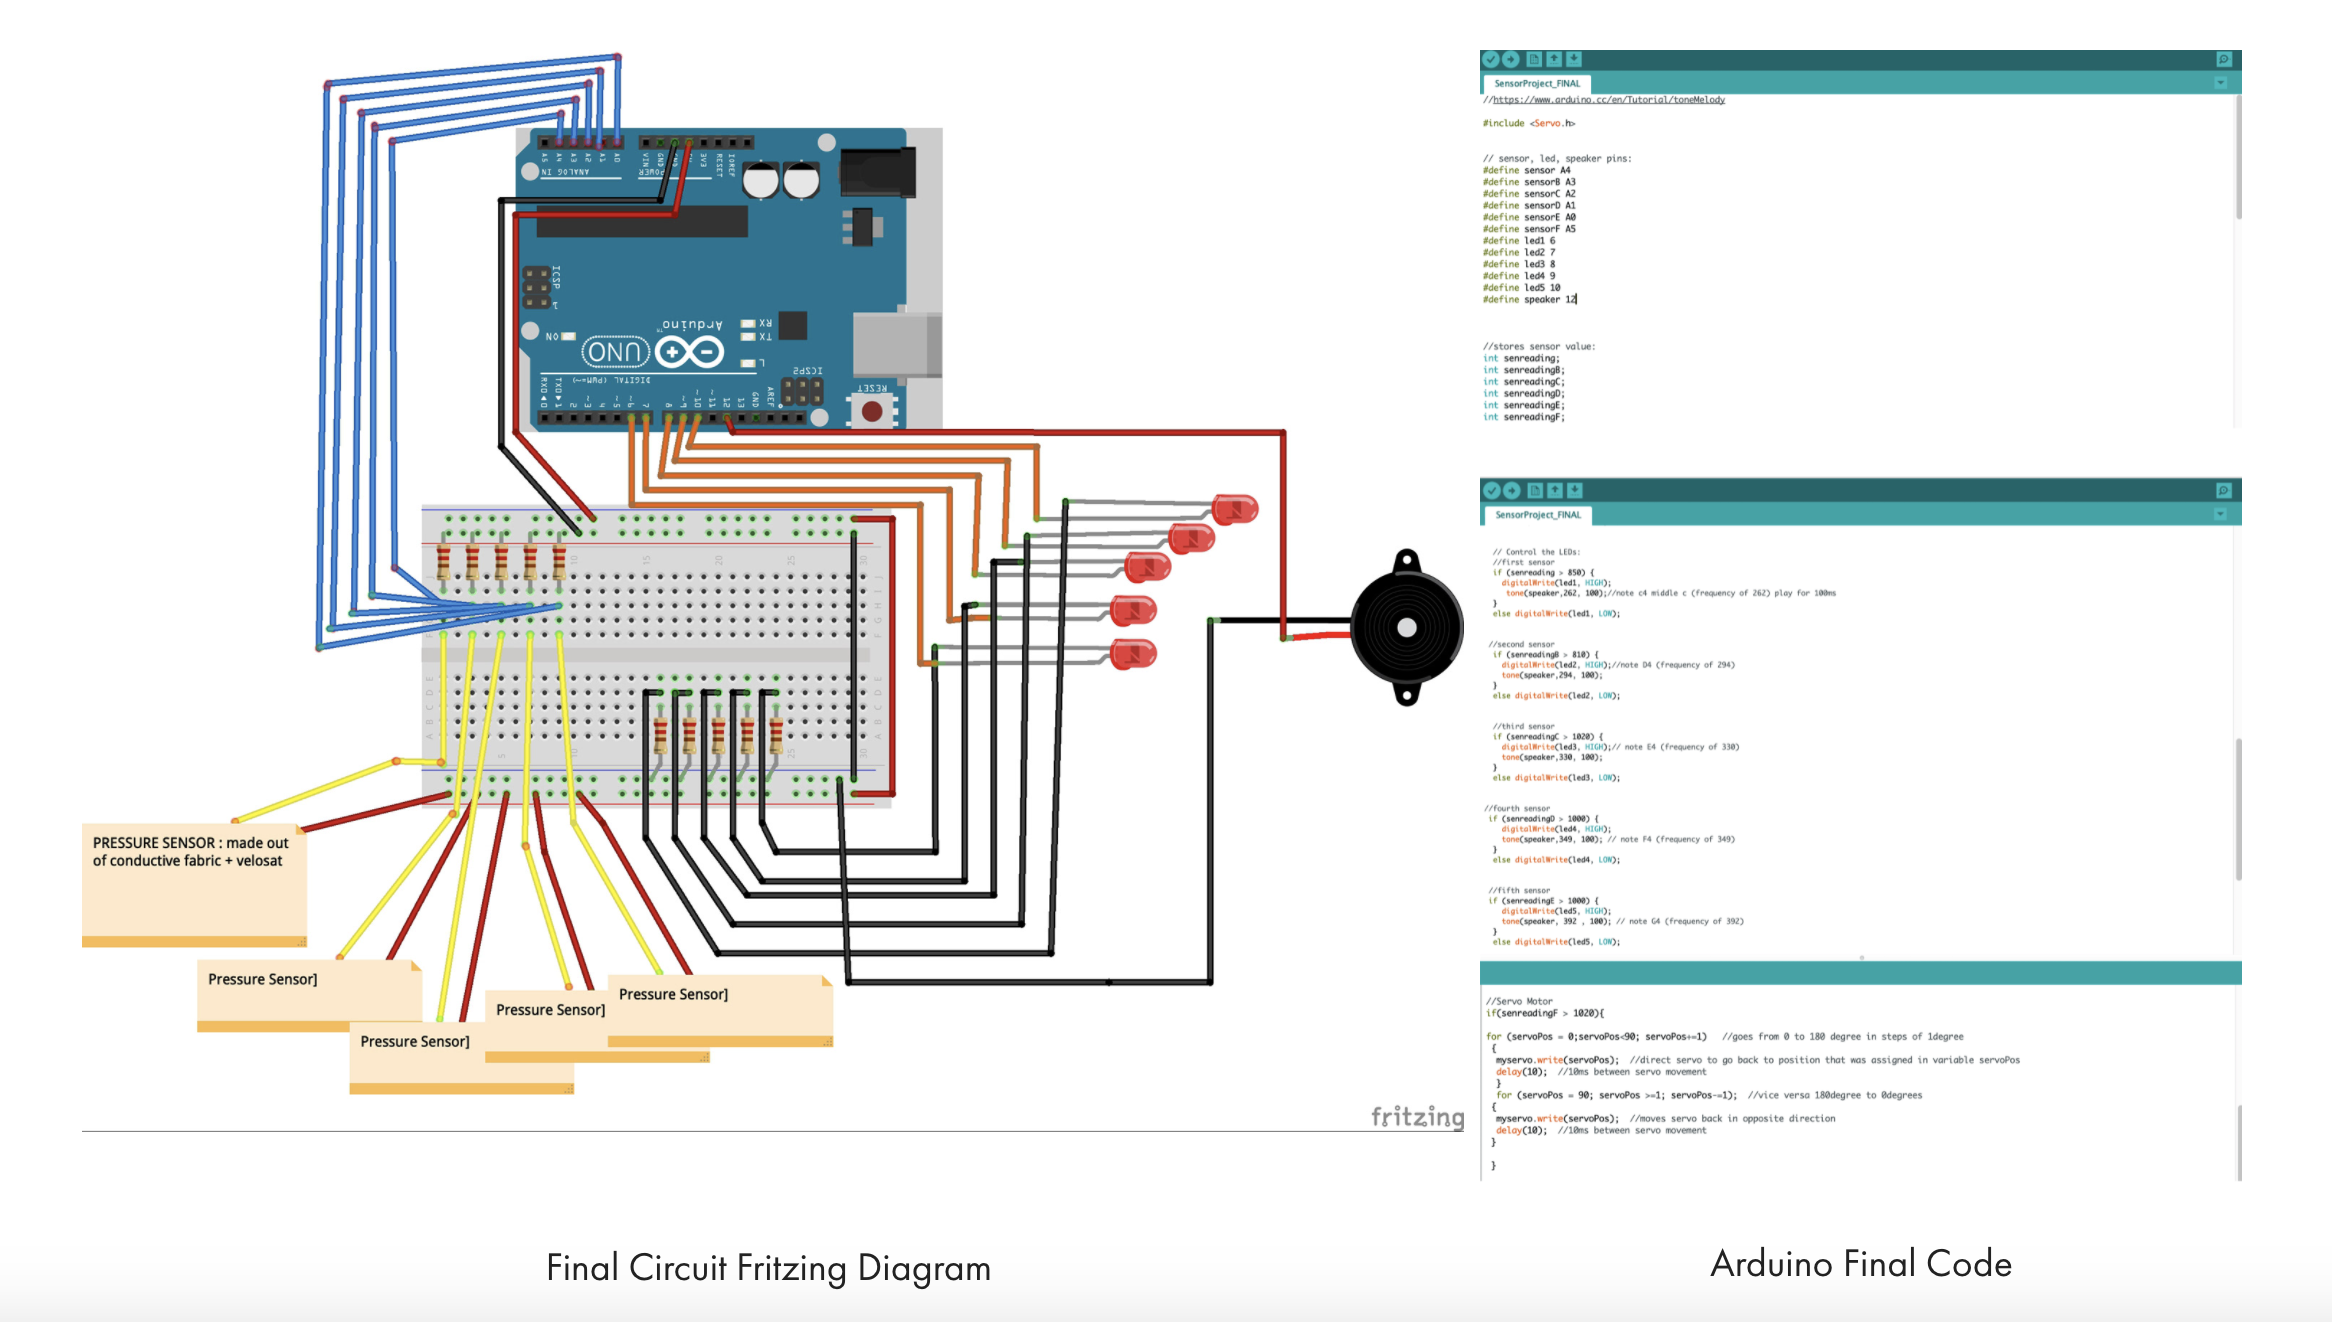
CIRCUITRY
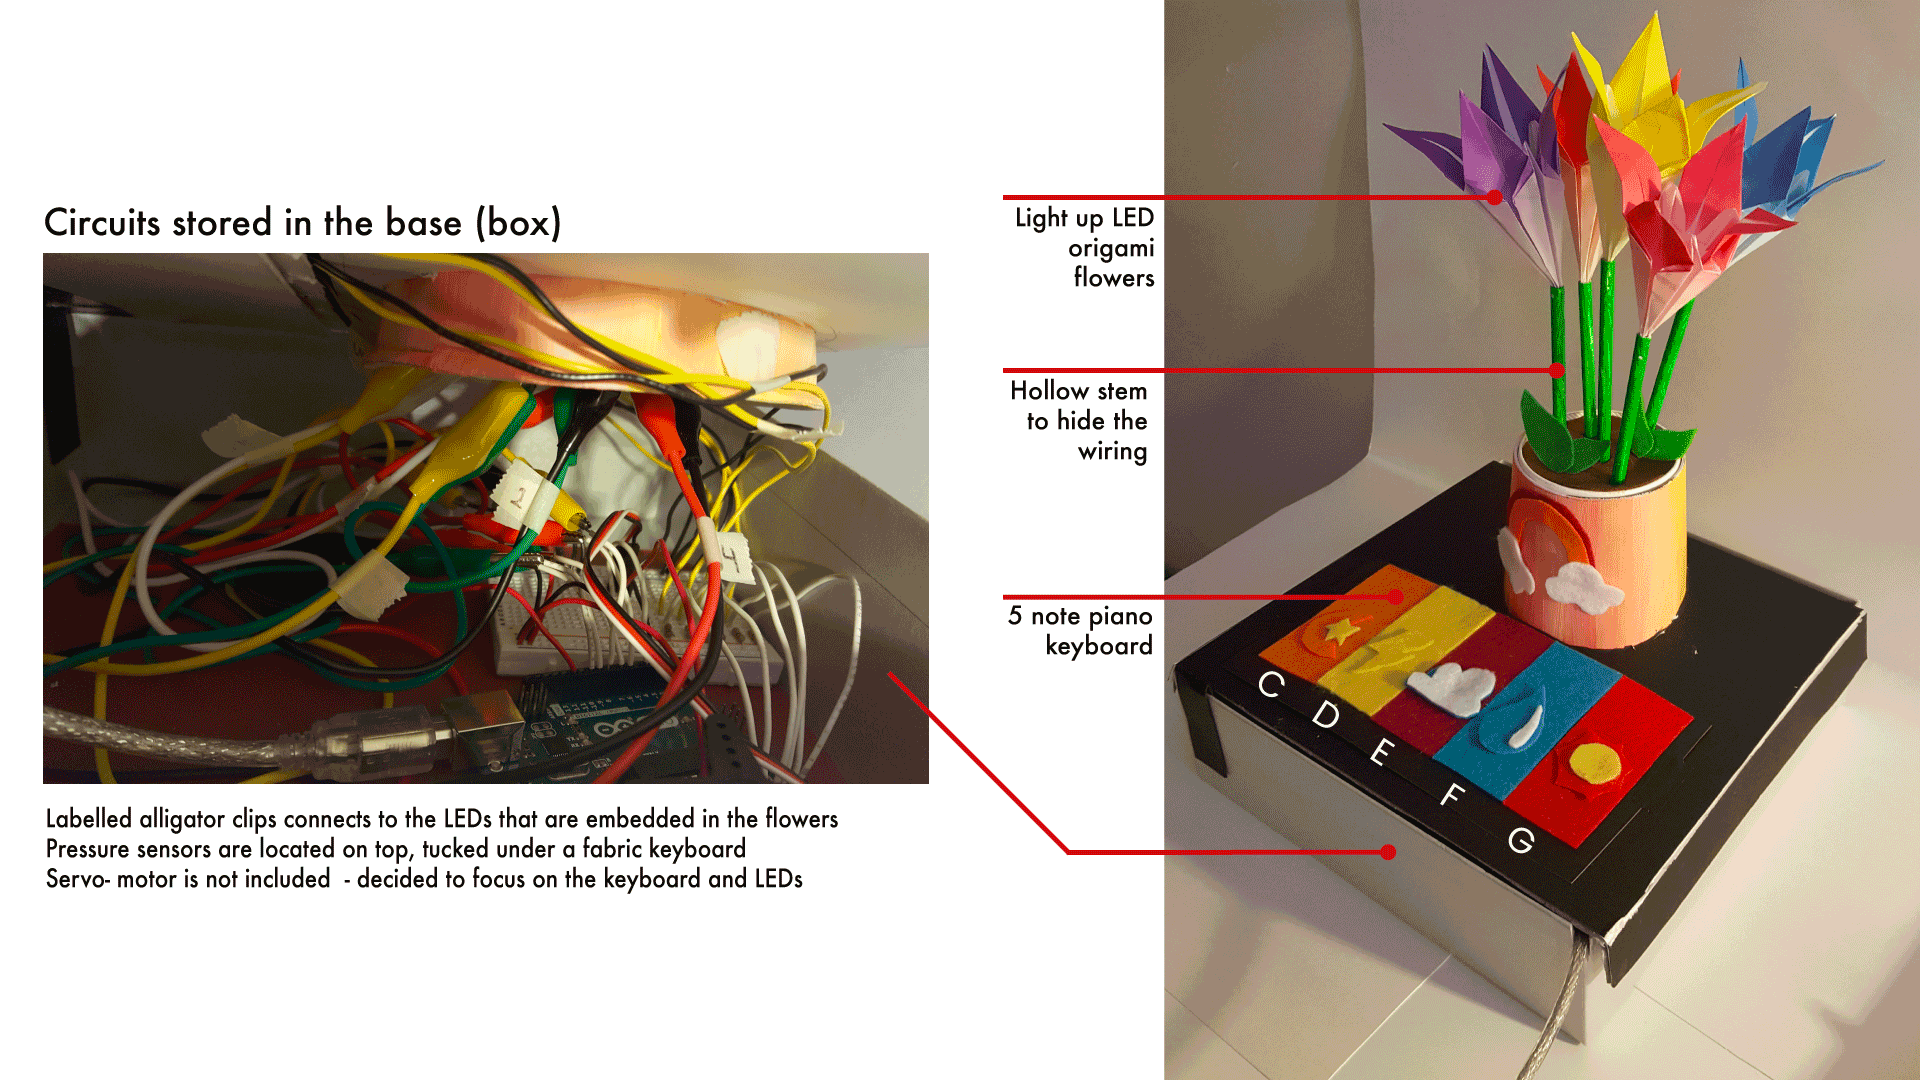
The final product uses pressure sensors as the main trigger for the embedded actions. I have made my own sensors using conductive materials and connected the circuit to an Arduino Uno. I believed pressure sensors are the best choice for the piano key as it mimics closely to the real keys with its pressing functionality.
CODING
In order to output sound to mimic the piano keys, the Tone Library function that is available on Arduino was used. This function helps to generate notes that can then be put together to create many different melodies. The tones are generated by square-wave (periodic waveform - continuous transitions between two levels) of a specified frequency in hertz, calculated in milliseconds. (higher frequency, higher pitch) Adjustments were made to the sensors to heighten its sensitivity in order for users to be able to trigger the sound and LED clearly and easily without having to put so much pressure.
TOUCH & FEEL PROTOTYPE / MATERIAL DIAGRAM
The UI of the final app prototype went through several changes after user testing feedbacks and heuristic analysis were conducted. It is important that the app is easy to use as it hopes to target a wide range of users, and so making sure that the final product meets the criteria of the best UX practices is key in ensuring the design is rational and thoughtful throughout.
DESIGN PROTOTYPE
With the help of the digital mockups and iterations, the working prototype was created with a clear guideline. This made it easier to build the prototype since there was an inspiration to follow, and so there were more focus on the potential problems that arise ( mainly hiding of the circuits and ensuring the product looks presentable).
Due to a constraint on time, the project was unable to fulfil the movement aspect of the design; although it have successfully integrated within the coding and circuits, it was not able to be integrated into the actual working prototype. With limited time, decisions were made to focus fully on the sensor piano keys.
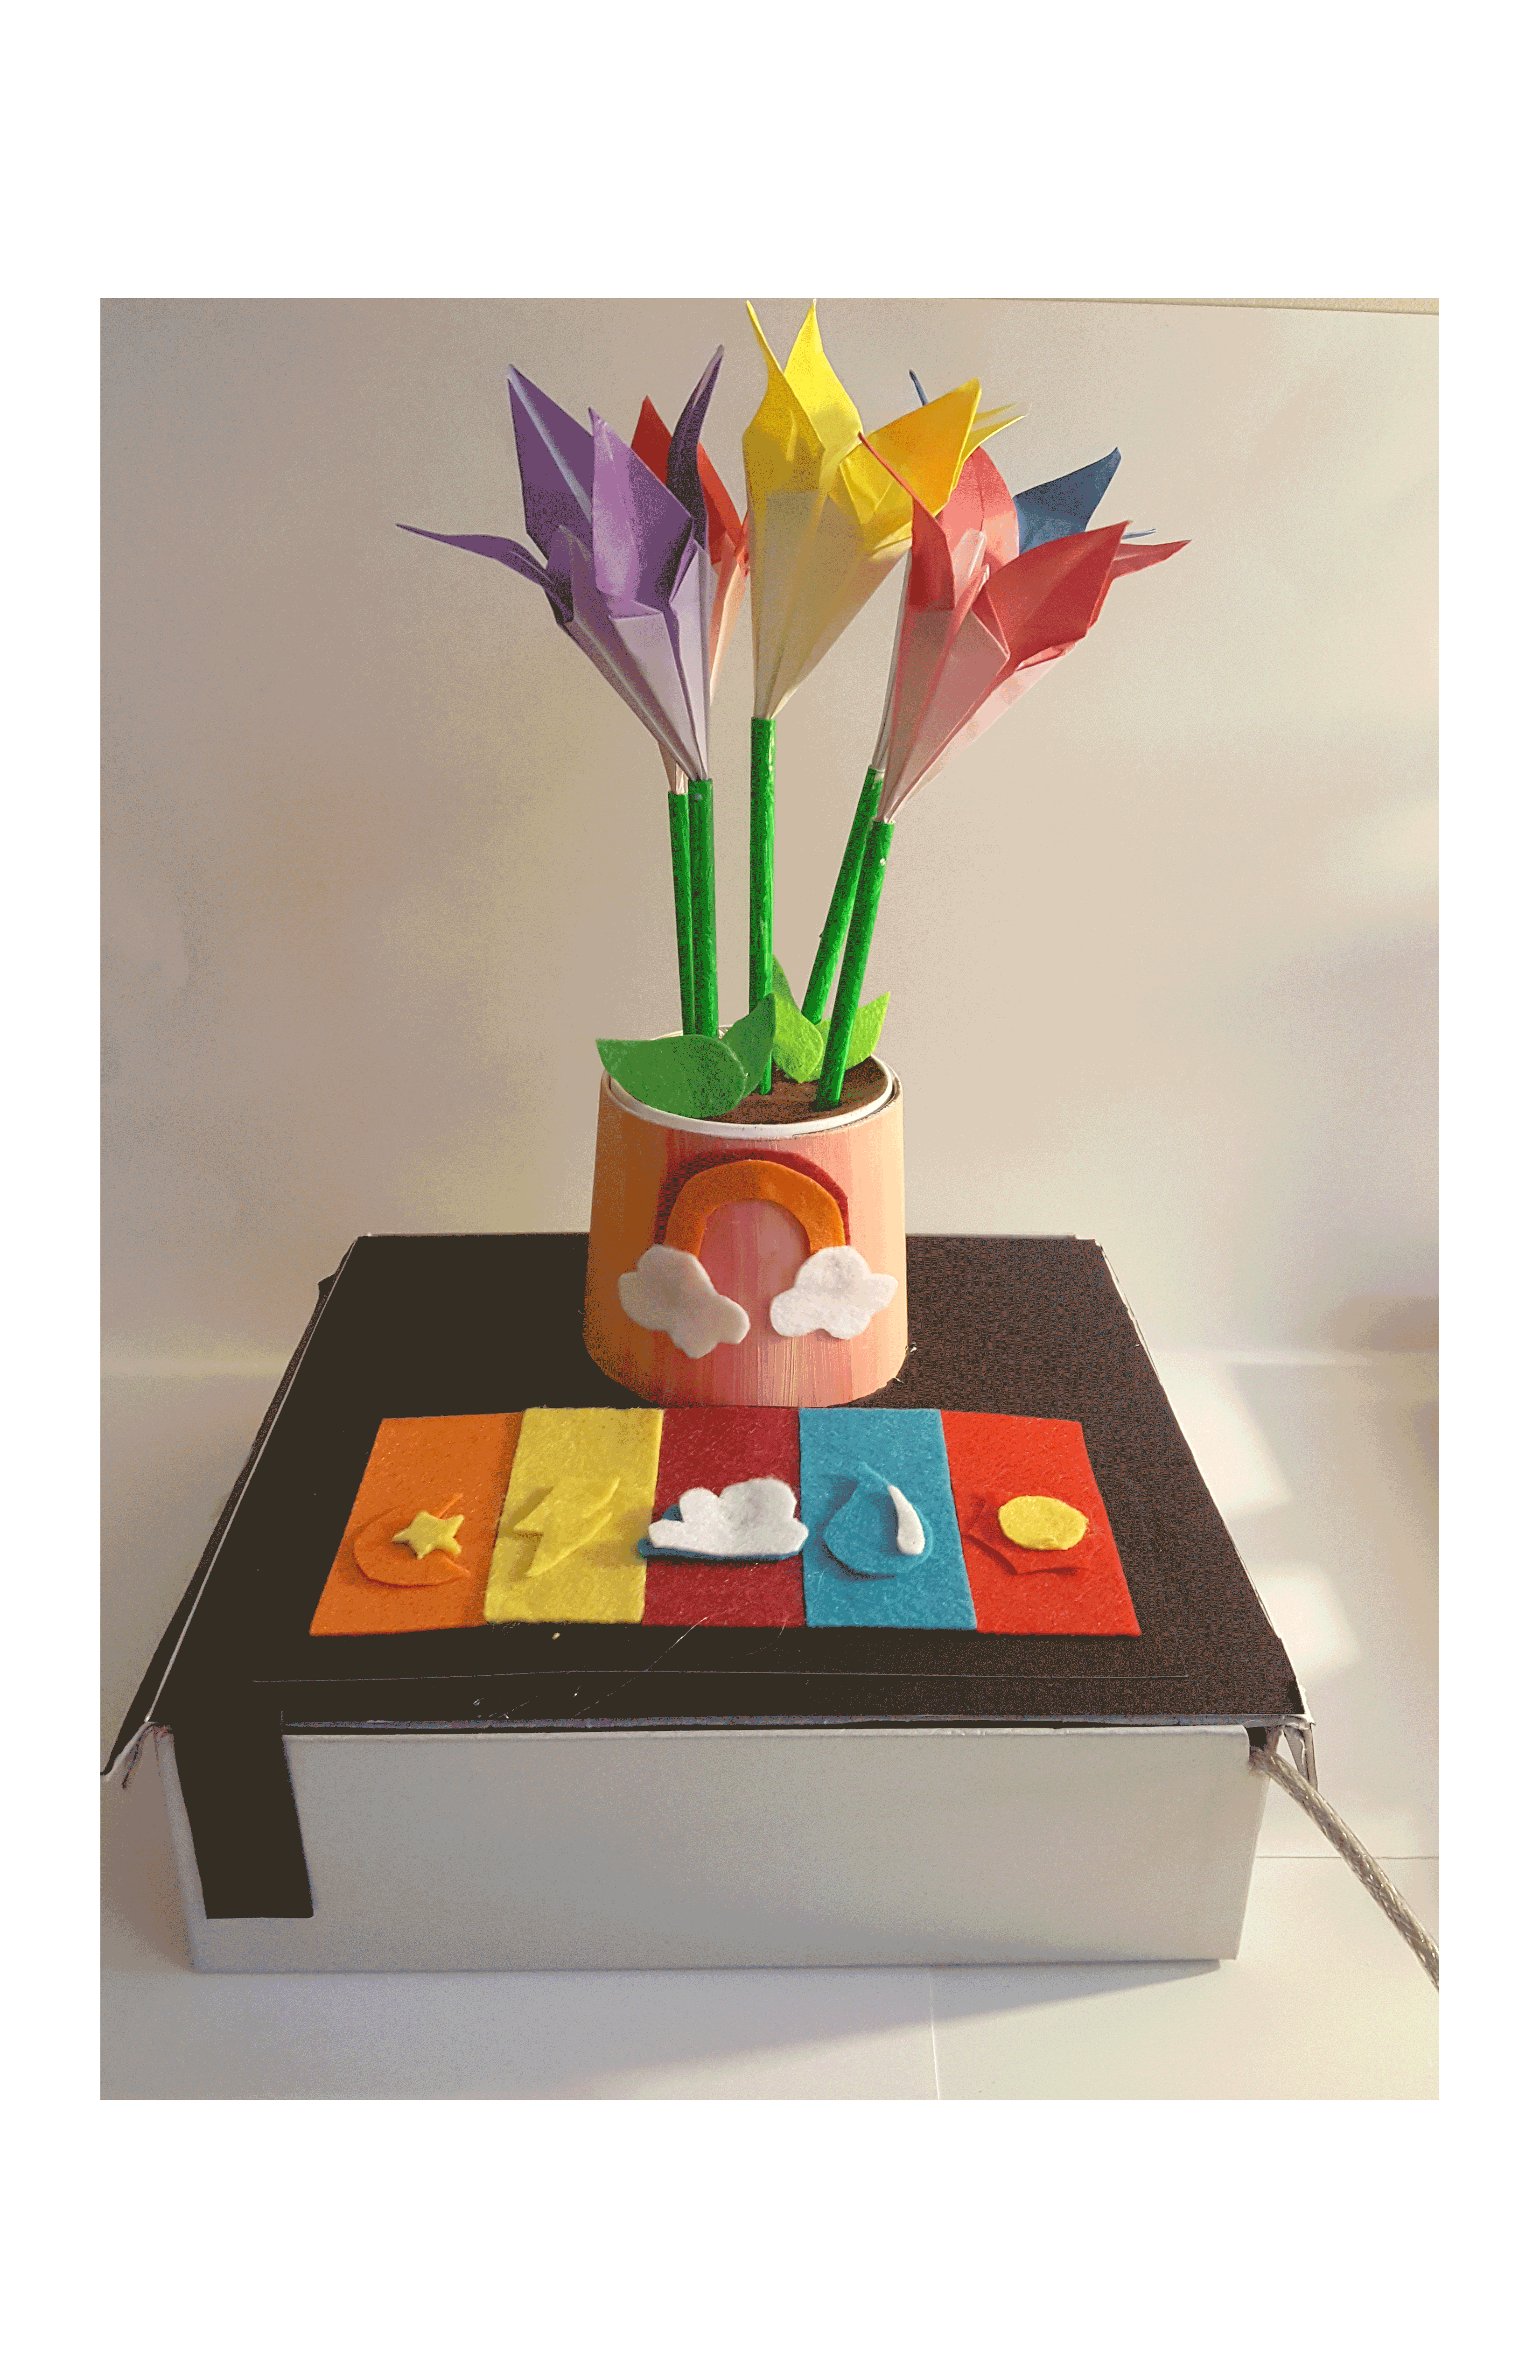
FINAL MODEL
PROTOTYPE
The challenge was to ensure that every component fits together like a puzzle piece. The best way to do so in this situation was colour coding the pieces so that the flower would match the keys. The base that holds and hides away the circuitry helps to ensure the flower and keys stand out and easily captures user's attention as the bold colours are against the black surface, whiles also bringing everything together as one functioning product.
Working Prototype Video Demonstration
Showcasing: LEDs integrated into each flower | Sounds of each piano key | A section of Ode to Joy
Reflection
Starting with a prompt and branching off from there may all seem too easy but of course, there are still challenges. After exploring the conductive materials, and reading up on different case studies that utilizes them, I was inspired to create a piano type artifact. This was a sudden idea that I had really connected with and it became a reversal step where I then had to think of the users. Of course, my immediate attention was children, but through the process I wanted to expand on its users as I felt that "play" is something done by anyone, not just children. I wanted this artifact to serve more than one purpose and more than one audience but I was being unrealistic and had to scale down. I learned that refining the design is a forever process because when it comes time to take the design and bring it to life, nothing can be predetermined. Anything can happen and the best way to approach these hurdles is the ability to adapt and refine. However, I was able to establish a list of problems and potential solutions to them before starting to build the prototype, hence I was able to overcome some hurdles with confident.
Next Steps
- Conduct prototype testing on real users to gain user feedbacks of the whole experience and upgrade the possible features that already exist.
- Improve the material used ( explore different materials - possibly industry materials).
- Enhance the use case and narrow the user audiences.
- Test out the other designs that were generated to further expand on the idea.
- Expand on the product design and help elevate the activity into something more educational and encourages children to think creatively or strategically.
- Expand the range of sounds to fully mimic the piano.
- Integrate movement into the product by including the servo motor again!


